
Perfect Pumpkin Pie with Sweetened Condensed Milk
This pumpkin pie with sweetened condensed milk recipe is where warm, rich fall flavors come alive! A perfectly sweet twist on a classic dessert that’s a lot easier to make than you think. This recipe has been tested multiple times and I have all the tips and tricks to help you make a perfect pumpkin pie this fall season!
If you want a delicious twist on this pie, try this amazing Biscoff pumpkin pie recipe!
What readers are saying...
“This is the best pumpkin pie recipe! Everyone raved over it and it was so easy to make.”
– WENDY


What makes this pumpkin pie so special?
This creamy pumpkin pie recipe might be the last pumpkin pie recipe you’ll ever need! After MULTIPLE tests, all of my testers agreed it was the best pumpkin pie they’ve ever had. Everyone loves the smooth, creamy texture and the rich flavor that only sweetened condensed milk can bring! And since this recipe has been tested so many times, I have all the little tips and tricks to make your pie perfect the very first time!
RECIPE INGREDIENTS
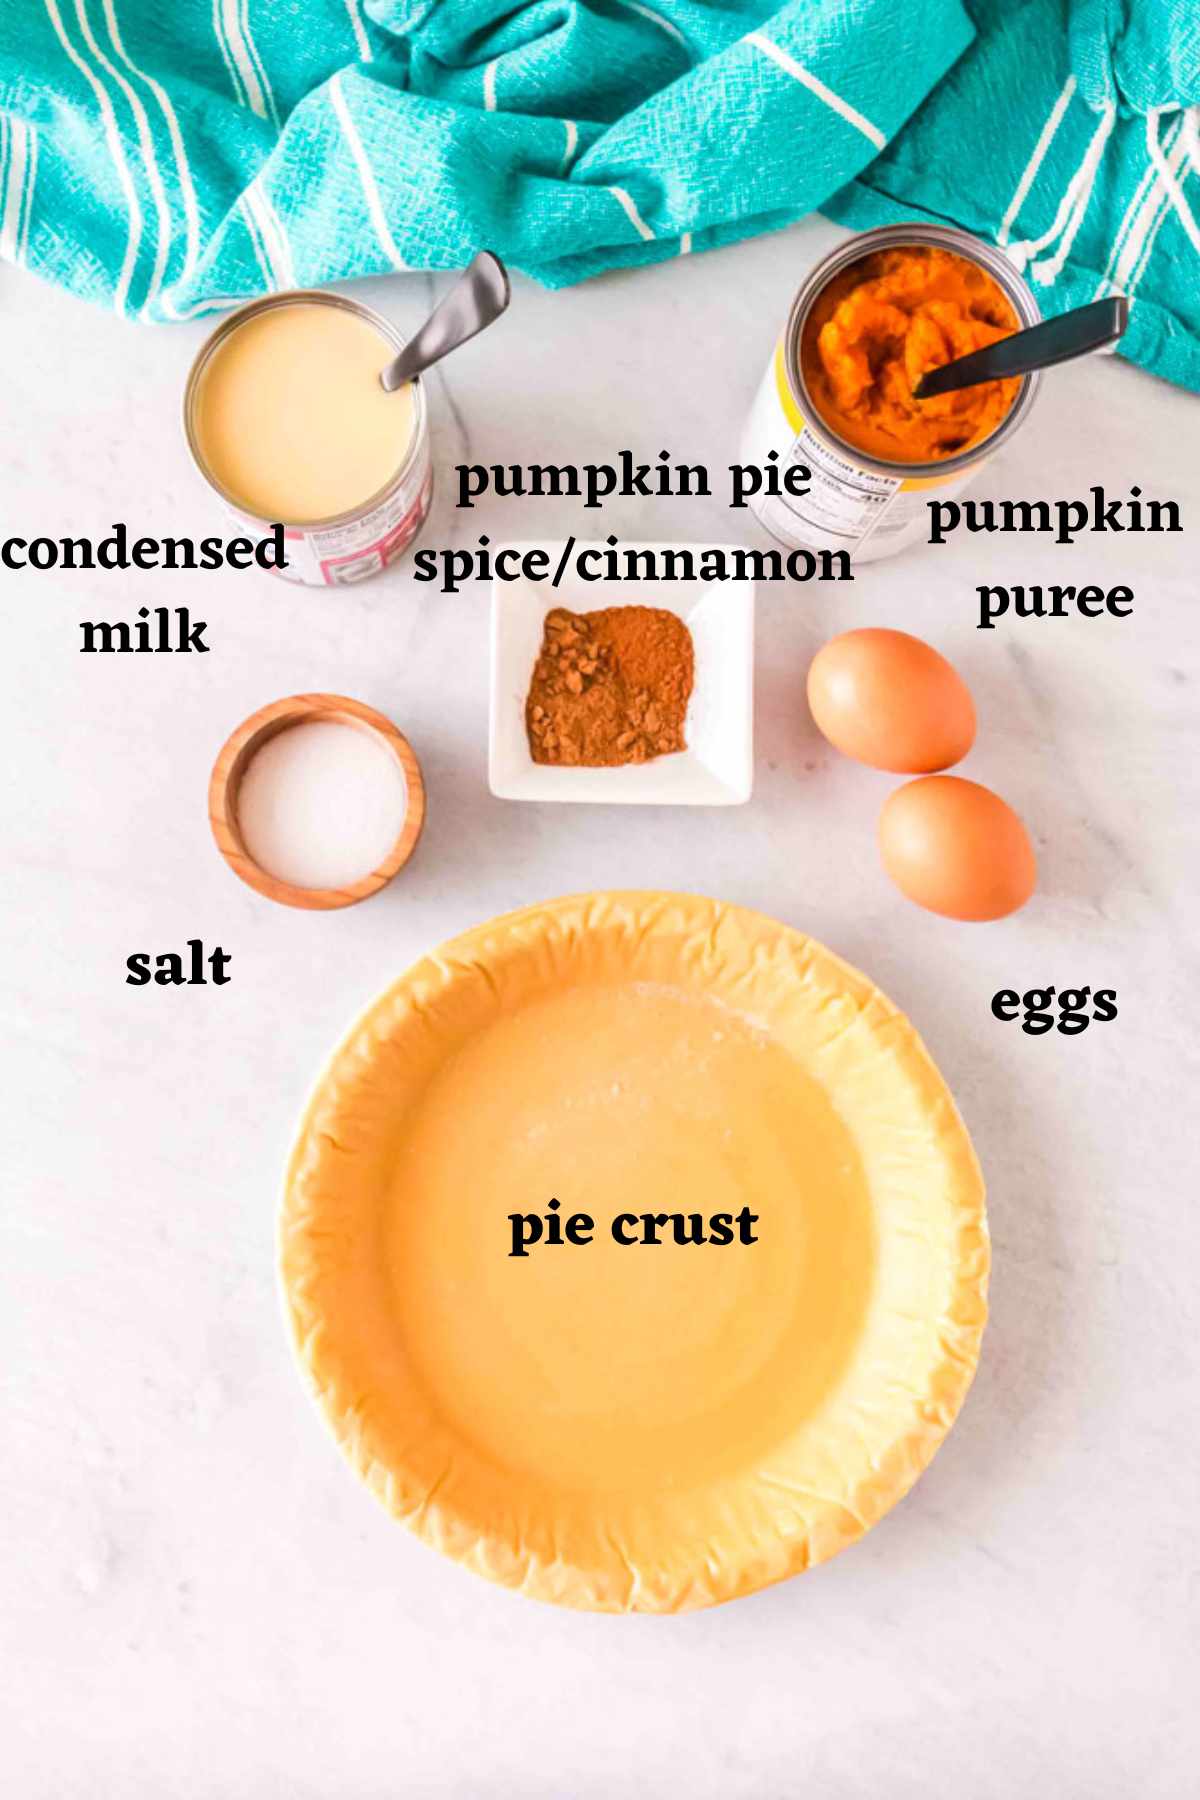
You’ll need the following ingredients to make this delicious pumpkin pie with sweetened condensed milk recipe:
INGREDIENT NOTES & SUBSTITUTIONS
Pumpkin puree: Use pure pumpkin puree–without any sweeteners. Don’t use pumpkin pie filling.
Sweetened condensed milk: Make sure you are using sweetened condensed milk like Eagle Brand and NOT evaporated milk like most pumpkin pie recipes call for.
Pumpkin pie spice: Using a pre-made spice blend is for ease (who needs more stress around the holiday season, right??). However, if you want to use your own spice blend, I include a recipe in the recipe card below.
Pie crust: You are more than welcome to make your own homemade pie crust, but I typically opt for a pre-made pie crust. If you are making your own, make sure to check out these foolproof tips for making a pie crust! You can also use a graham cracker crust.
HOW TO MAKE PUMPKIN PIE WITH SWEETENED CONDENSED MILK: STEP-BY-STEP
Here are some quick visual instructions. Remember that full instructions with exact ingredients will be in the printable recipe card below.


CASEY’S TIPS
- Room temperature ingredients: This recipe has been tested MANY times and I’ve found the best way to get it perfect is to make sure your eggs and your pie crust are both at room temperature before you start!
- Don’t overmix: Resist the urge to overmix the pumpkin filling! This may cause your pie to “dome” up as it bakes. Just mix/whisk gently until all of the ingredients come together. No need to use an electric mixer or food processor.
- Extra spice: Add 1/4 tsp of ground nutmeg to increase the “nutty,” rich flavor.
- Finish: Pipe yummy whipped cream on top of the pie to make it fun and festive! You can use a piping bag and tips like these.

Casey’s Top Tip: Blind baking the crust (pre-baking it) for about 10 minutes will ensure the bottom does not get soggy when it is baked with the filling. Don’t skip this step!
STORAGE & REHEATING
- Storage: Store leftover pumpkin pie in the fridge with the pie pan covered tightly with plastic wrap or aluminum foil for 3-4 days. Pumpkin pie should be stored in the fridge within 2 hours of baking. For complete storage tips, go to: How Long Does Pumpkin Pie Last in the Fridge?
- Freezing: Pumpkin pie can be frozen (tightly covered) for 1-2 months for maximum freshness. See all of my freezing tips here.
The Secret to Getting Perfect Slices
Here are the secrets for those pretty, clean slices of pumpkin pie:
- Chill: For truly clean edges, cool the pie to room temperature, then chill in the fridge for at least 4 hours or overnight before slicing.
- Warm the knife: Run your serrated knife under hot water, then wipe it dry before cutting. This melts slightly into the filling instead of tearing it.
RELATED…
If you need more fall pie inspo, try No Bake Double Layer Pumpkin Pie and Pumpkin Pie without Evaporated Milk, Maple Pecan Pie, No Bake Hot Chocolate Pie or my Grandma’s Sweet Potato Pie!


Did you try this recipe?
Let us know your thoughts on this pumpkin pie with condensed milk by leaving a star rating below or sharing it on Instagram!
Thank you! ~ Casey

Perfect Pumpkin Pie with Sweetened Condensed Milk
Ingredients
- 1 premade 9-inch pie crust thawed and uncooked (See tips below)
- 1 15 oz. canned pumpkin puree pure pumpkin puree not pumpkin pie filling
- 2 tsp store-bought pumpkin pie spice See tips below for substitution
- 1/2 tsp ground cinnamon See tips below for substitution
- 1 14 oz. can sweetened condensed milk we like Eagle Brand
- 1/4 tsp sea salt just a pinch of salt!
- 2 large eggs
Instructions
- Prep: I have tested this recipe MANY times and for the best possible outcome, bring your eggs and crust to room temperature before starting. Just leave the eggs out on the counter for about 1-2 hours. Make sure your crust is thawed and not freezing cold. Room temperature is best.Preheat oven to 350°F.
- Par-bake/blind bake crust: With a fork, poke the crust a few times on the bottom and on the sides. Bake in preheated oven for 10 minutes (this is called blind baking and prevents the crust from getting soggy when baked with the filling). Remove crust from the oven and set aside to cool. Turn up your oven to 425°F and allow it to preheat.
- Prepare filling: While the oven is preheating, prepare filling. In a large mixing bowl, combine pumpkin puree, pumpkin pie spice, ground cinnamon, salt, sweetened condensed milk, and eggs. Whisk until combined.Note: After testing this recipe MULTIPLE times, I found it best not to overmix. Once all of the ingredients are well-combined, stop mixing. Use a simple whisk vs. an electric mixer. Using an electric mixer or overmixing will allow too much air into the batter, leading to a final texture that is not as smooth and silky.
- Pour & bake: Pour batter into prepared pie crust. Bake in preheated oven (425°F) for 10 minutes. Tip: I like to place the pie on a baking sheet to make it easy to slide in and out of the oven.
- Reduce heat: Decrease the oven temperature to 350°F and bake an additional 35-40 minutes. Note: The center of the pie will still be slightly jiggly but the edges will be set. The internal temperature should be at 180°F at a minimum. If you find the edges of the crust are getting too brown, cover the crust with aluminum foil or use a pie shield.
- Finish: Remove pie from oven and allow to cool. Top with cinnamon whipped cream and serve!Tip: The secret to getting perfectly clean slices — chill the pie in the fridge for at least 4 hours or overnight before slicing. A COLD pie will give you the best, most clean slices.
Notes
Casey’s Tips
- Pie crust: For ease, I love using premade store-bought pie crust like these–you get the fun edges predone, too! You can also buy store bought pie dough and roll it out into a 9-inch pie plate. Last, if I make my own homemade pie crust, I use this recipe from Pioneer Woman.
- Homemade pumpkin pie spice: You can substitute store-bought pumpkin pie spice & cinnamon in this recipe with: 2 tsp cinnamon, 1/2 tsp ground ginger, 1/4 tsp nutmeg, 1/2 tsp cloves.
- Extra spice: Add 1/4 tsp of ground nutmeg to increase the “nutty,” rich flavor.


This recipe has been tested SOOOO many times and it’s perfect! It’s rich, creamy and I know you will love it! XO ~ Casey
Hi how far in advance and this pie be made and can it be frozen.
Hi Debbie, If you cover it tightly it will stay fresh for 1-2 months. If you scroll up there’s a link to all of my pumpkin pie freezing tips 🙂 XO ~ Casey
the recipe says to cook at 425 for 10 minutes; then lower the oven to 350; do i take the pie out of the oven after the 10 minutes at 425???????
No, continue baking — decrease the oven temperature to 350°F and bake an additional 35-40 minutes. Enjoy!
This came out absolutely perfect. Next time I’m going to make two!
Sweetened condensed milk makes all the difference. This was absolutely delicious!
thanks for the overmixing tip! I’ve totally done it before and your tips helped so much.
This is the best pumpkin pie recipe! Everyone raved over it and it was so easy to make.
This looks like an incredible pumpkin pie, and so perfect for fall. Can’t wait to try for myself, I think I’m going to give that graham cracker crust a shot!