
18+ Affordable Resources for Food Bloggers
Here I have complied a list of the best affordable resources for food bloggers! When you first start out as a blogger, it’s easy to get distracted by all the shiny things! But don’t go overboard! Here are 18+ essential tools I used my first year of food blogging that helped me reach over 50k sessions in less than a year!
Food blogging is one of those businesses you can start with very little overhead. Unlike a restaurant or other small business, there is no need to pawn your life savings or take out a loan to start your food blog!
Yes, it DOES take some money to get started and you MUST MUST constantly invest in your business! However, these investments are pennies compared to starting most other businesses!
Like with any investment, you need to be smart and make wise choices.
With food blogging, there is definitely a tendency to go for ALL THE SHINY OBJECTS!
Courses! Props! Photo equipment! Linens! Oh My!
I feel like in one year, I did A LOT of “the things.” The point of this post is to narrow it down what I feel helped me the most and played the biggest role in getting me to Mediavine (50,000+ sessions) in less than a year.

Courses/Education
Let me be straight-up: there are a lot of bad courses out there…and bad advice! I am all about learning from solid, free resources! I am only recommending TWO paid courses here because they are the two I feel have been HANDS DOWN the best bang for the buck!
Top Hat Rank Webinars (Cost: Free)
Top Hat Rank hosts AMAZING monthly one hour live webinars on everything SEO related. I suggest you start with the very first webinar and work your way all the way through them! They are SO VALUABLE! This is where I learned about SEO…I had NO IDEA what those 3 letters meant when I started blogging!
Eat, Blog, Talk Podcast (Cost: Free)
LOVE, LOVE Megan Porta’s podcast, Eat, Blog, Talk! She is such a skilled interviewer and is a food blogger and right in the trenches with us!
Mediavine Teal Talks (Cost: Free)
This is one I wish I would have found BEFORE I joined Mediavine! There is so much valuable information that will help grow your blog, even if you haven’t yet met their 50k threshold.
Some of my favorite episodes are Photographing for Page Views and Mythbusters: SEO Edition with Eric Hochberger and Mike Pearson.
The Blogging Millionaire Podcast (Cost: Free)
Short, to the point podcast episodes with Brandon Gaille (creator of Rank IQ). I love these podcasts because they always leave you with specific, actionable tasks.
Cooking with Keywords (Cost: $225, or 3 payments of $75)
This was a #gamechanger for me in getting my posts to rank. It’s intense but really, really helped me understand the ins and outs of “ranking” and how to choose keywords that will RANK!!!
She recently raised the price a bit, but it’s one of the most affordable courses out there for a WEALTH of information. If I could start all over, I’d take this course before I ever hit “Publish” on one blog post.
If there is ONE course you should take, this is the one.
Food Blogger Pro Podcast (Cost: Free)
Ok, I kinda sorta reluctantly recommend this podcast…how’s that for wishy washy?! I like it and there are many valuable episodes, but many of them will go WAY over the head of a new blogger. And the last thing you want to do is to get even more overwhelmed than you already are–lol! Am I right?!
I would look through the episodes and see which topics you think would benefit you. Optimizing your Food Blog’s SEO with Casey Markee is a good place to start if you’re new to the world of SEO.
I also like episodes that tell personal stories like this one: Going All In: How Sarah Cook went from 17k to 600k page views. These stories are so inspiring!
Read my first blog income report: Food Blog Income Report, December 2021.
Pretty Focused Photography Course (Cost: $697-$1,997, payment plans available)
Ok, maybe this price tag isn’t necessarily “affordable,” but hear me out. I am ONLY recommending TWO courses (and I have taken a TON of courses!!): Pretty Focused and Cooking with Keywords.
One course covers SEO/getting posts to rank, and one covers photography. Two skills YOU MUST HAVE as a food blogger. Honestly, when you are starting out, everything else goes by the wayside.
Focus on SEO and photography and you will set yourself up for success right from the start.
I took Foodtography School before Pretty Focused and it was OK, but I would never recommend it over Pretty Focused. Melodee is a fantastic teacher and so REAL. She teaches you to photograph food, not just for pretty photos, but to make your food look “YUMMY!”
If you enroll in Tier 3, you can undergo the rigorous “portfolio” process and be set up to be a photographer not only for YOUR blog, but photographing for other bloggers, too! I am currently in the process of this right now!
Check out the graduate directory to see the inspiring portfolios! Many of these people are just like most of us and had never really picked up a DSLR camera before they started: Pretty Focused Directory.
Amazing, right? You can watch this Mediavine Teal Talk if you want to learn more about the course and their philosophy….and get some great tips and tricks!

Research Tools
Having at least 2+ solid keyword research tools is essential. I suggest one free and one paid.
Keysearch (Cost: $17/month): Simple, user-friendly and so easy! You definitely want to start with Keysearch if you are just starting your SEO journey. 🙂
Rank IQ (Cost: $49/month): Instead of YOU finding keywords you think will rank, Rank IQ has done the work for you. It’s a database full of low-competition keywords that new bloggers CAN ACTUALLY RANK FOR!
Rank IQ has been a game changer for me and has taken A LOT of work out of my keyword research. Of the first six “Rank IQ” posts I wrote, four of them ranked on page 1 and the other two were first on page 2…within DAYS. DAYS!! Not YEARS or even WEEKS to rank!!
Of the first six Rank IQ posts I wrote, four of them ranked on Page 1 and the other two were first on Page 2…within DAYS!
If you are on a strict budget, then the Cooking with Keywords course will teach you the concepts and how to find these rankable keywords. RankIQ just cuts out a lot of the work. 🙂
Keywords Everywhere (Cost: $10/100,000 credits): Keywords Everywhere is a Chrome extension. It will show you monthly search volume, competition score and long-tail keyword suggestions. $10 gives you a TON of searches. I use it as an additional tool to cross-reference with Keysearch.
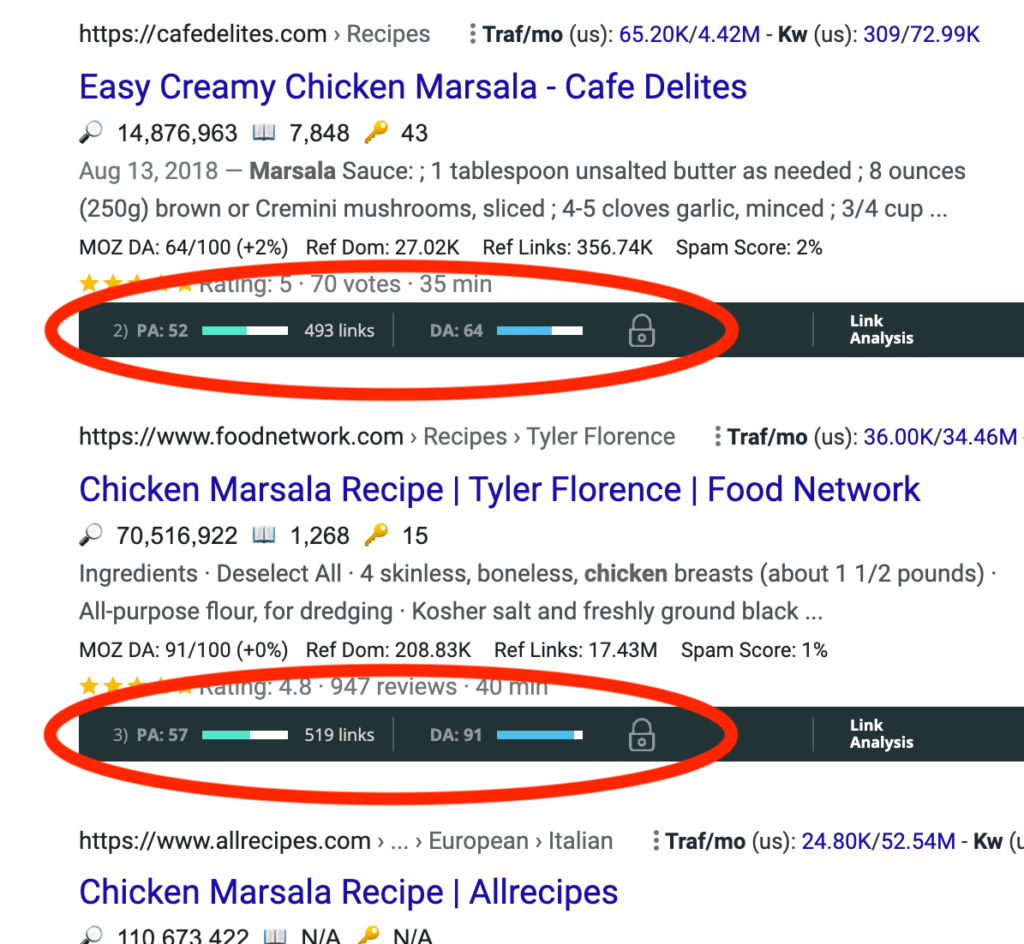
MozBar Extension (Cost: Free): This is a free extension in Chrome that will tell you the Domain Authority (DA) and the number of backlinks any webpage has. It’s essential when doing your keyword research to judge whether or not you think you can rank for a keyword.
This is the MozBar in action:
Hosting
You NEED good hosting and site speed, so start on the right foot from the get-go. Step AWAY FROM BLUEHOST!!
Most people go for Big Scoots–they have shared plans that are affordable when you are first starting out.
However, I went with WPOpt and I could NOT be happier!! In a year, I have not had one single issue with them, my site speed is lightning fast and I have always passed Core Web Vitals.
The owner, Charles, and his team are so responsive and help me with any questions I have (and that’s A LOT of questions!!). I pay less than $20 a month for hosting and daily backups. Such an amazing find in the blogging world!
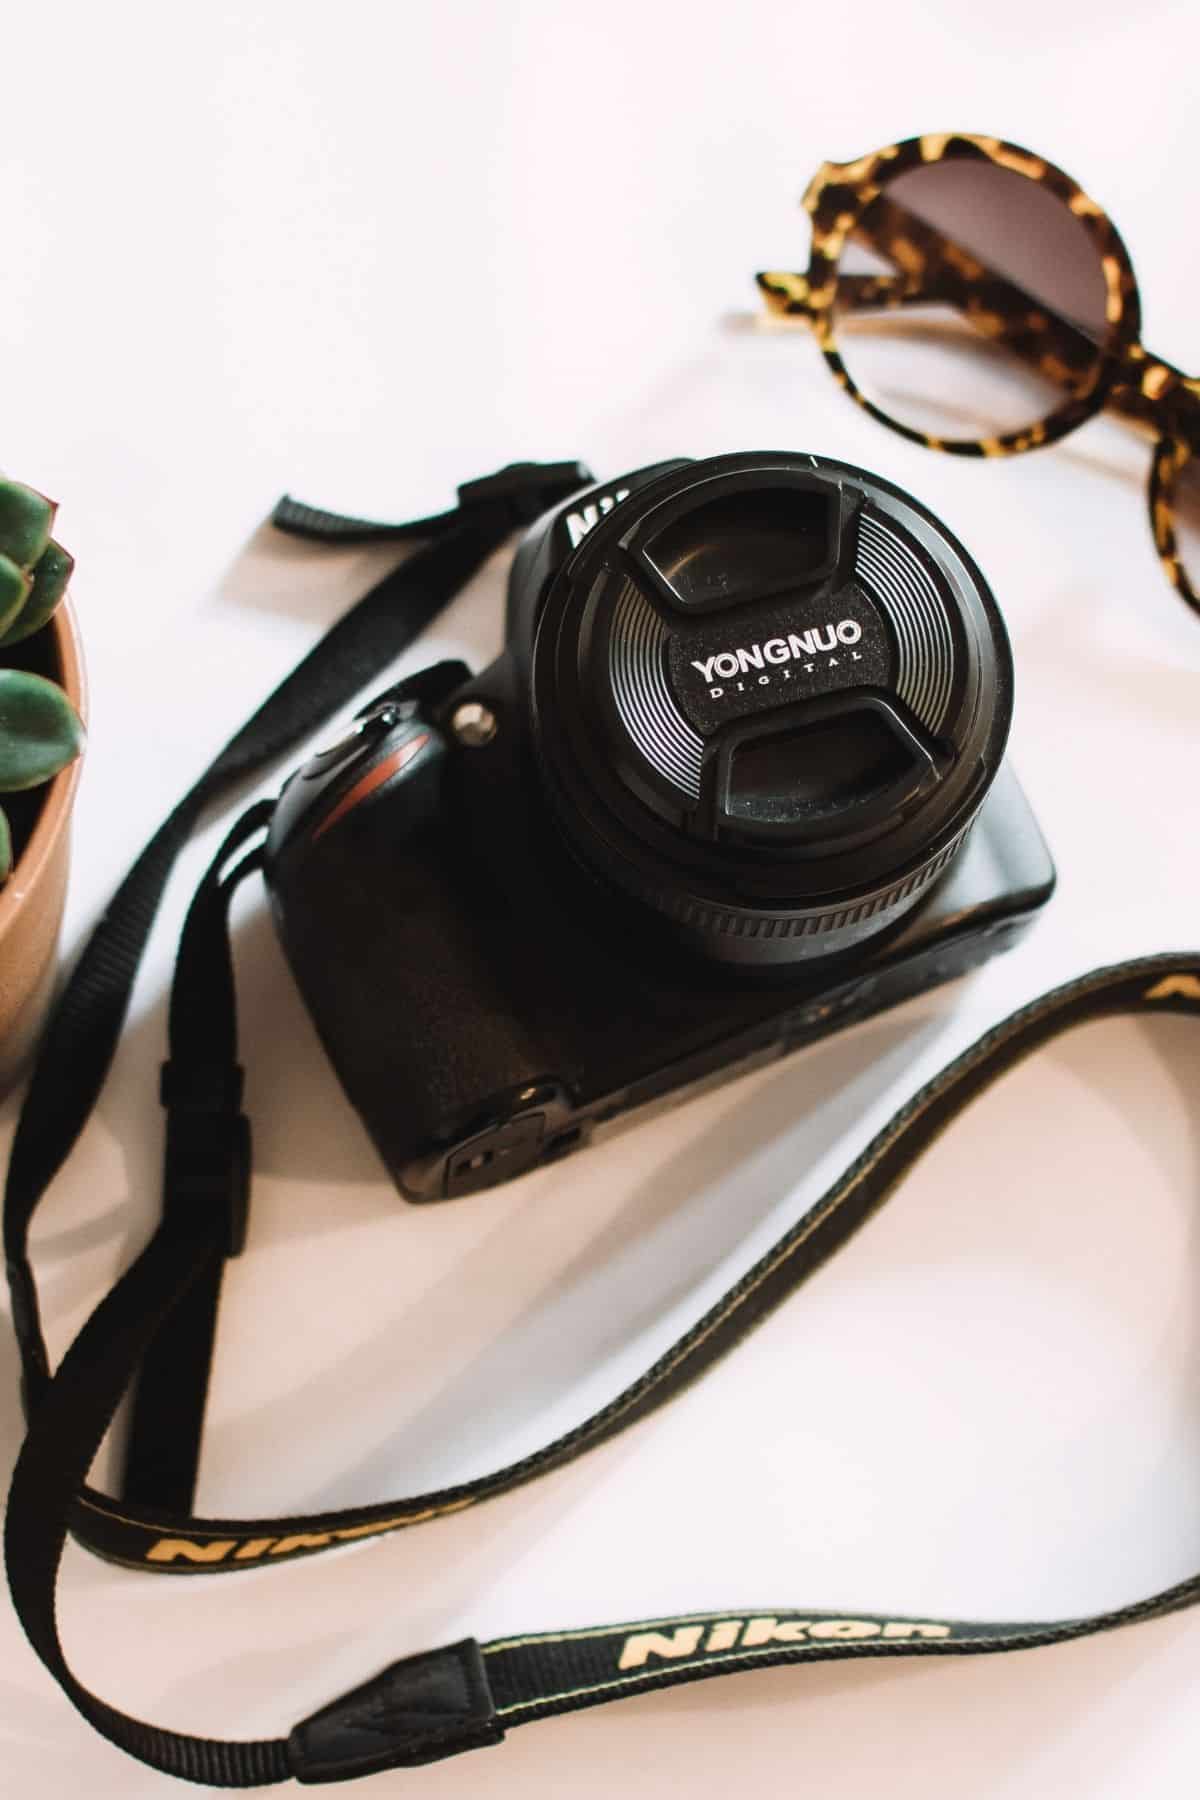
Photo Equipment
DSLR Camera: Step away from the iPhone. I battled with this for months until I finally bit the bullet and picked up up my old Nikon 3100 crop sensor DSLR camera.
The majority of the photos on my blog are shot with this camera and it was a great camera to get me comfortable shooting on a “real” camera.
The best camera is the one you have and that you’ll shoot with! So if you have an old DSLR, start with that guy. When you feel more confident, you can look into upgrading.
If you are looking to buy or upgrade, I highly recommend getting a FULL FRAME camera vs. a crop sensor camera. A full frame camera will shoot MORE of your photo–the camera’s “frame” is bigger. Full frame cameras are also produce sharper, clearer photos and are much better in low light situations. It was literally like night and day, no pun intended.
I was a Nikon girl, but I did tons of research and decided on the Sony a7ii Mirrorless and I love it! I have done everything thus far with the kit lens, but I am planning on getting a 100mm macro lens soon.
Check the used sections of Adorama and B&H…sometimes they will have display models or “new without original packaging”-type selections. They are usually a few hundred bucks less than brand new.
Foam Core Board: Two dollar-store foam core boards are what I use for bounce boards/backgrounds! They work like a charm!
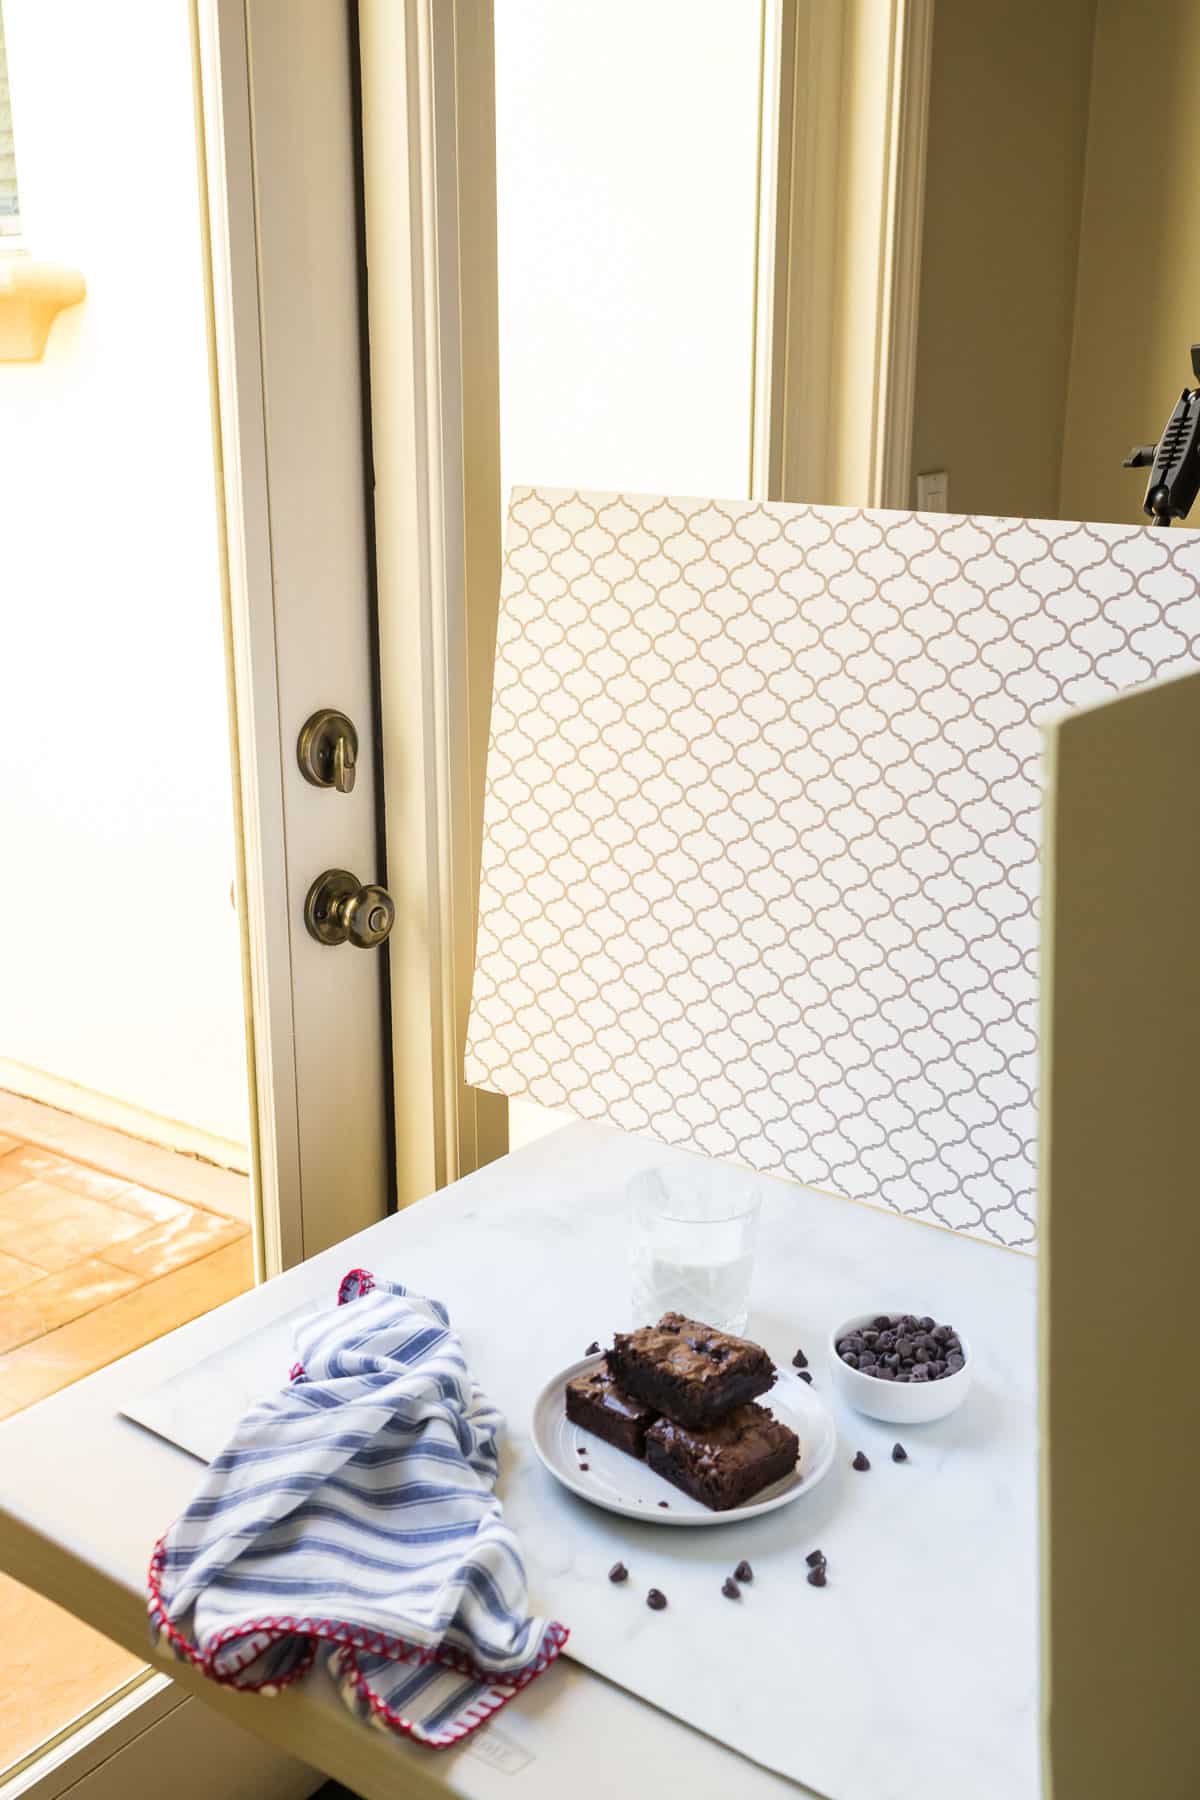
Diffuser: One of my favorite types of light to shoot in is direct sunlight with a diffuser! This is the one I have–it’s nice and big. You can use it as a bounce “board,” too! 🙂
Expo Disc: Another tool I wish I would have discovered earlier! I struggle with white balance in my photos SO MUCH!!! The Expo Disc has really, really helped with this! An Expo Disc simply helps your camera produce accurate colors and white balance vs. auto white balance. LOVE LOVE IT!
Step Stool: HAHAHA! You definitely need this to get those overhead shots! You may not think of it as essential, but it’s one thing I definitely couldn’t live without!
Backdrops
It’s EASY to go crazy when it comes to backdrops! Don’t!! (I did, don’t do it!)
A nice WHITE (faux marble, cement, etc.) backdrop is all you need to start. If you have one “white” colored backdrop, you can also add in a wood backdrop too. Home Depot or Lowe’s are the best places to find real wood for backdrops!
My favorite affordable backdrops so far are:
- Best Ever Backdrops: My favorite thing about these backdrops is that the “whites” are WHITE. I spent a year taking photos on a gray/blue “white marble” background that I THOUGHT was “white.” All of my photos were blue coming off the camera. I never even noticed it until I got a Best Ever Backdrop that was ACTUALLY white. I have their double sided “Stone Marble” and “White Concrete.”
Another thing I LOVE about Best Ever Backdrops is the customer service. ANY questions or concerns you have, the owner will address! She personally messaged me about a question I asked in their Facebook group! I love that attention to customers! (Save 15% with the code: GETONMYPLATE)
- Bessie Bakes: LOVE these backdrops, too! They are only sold on Amazon as of now. They are sturdy and stain resistant and I have never had an issue with them! I have this Gray Concrete board.
Props
Target: Magnolia’s Hearth and Hand line from Target is where I have gotten most of my tableware. It’s BASIC and affordable. You don’t have to go crazy, either. 2-4 plates (get small salad plates), bowls, etc. is fine. I am also a big proponent of just using serving dishes, small plates and bowls from your own cabinet!
Goodwill/Thrifting: I have found the best CHEAP silverware and serving dishes at thrift stores! And speaking of thrift stores, while you’re there….grab some “linens!!” (read on…)
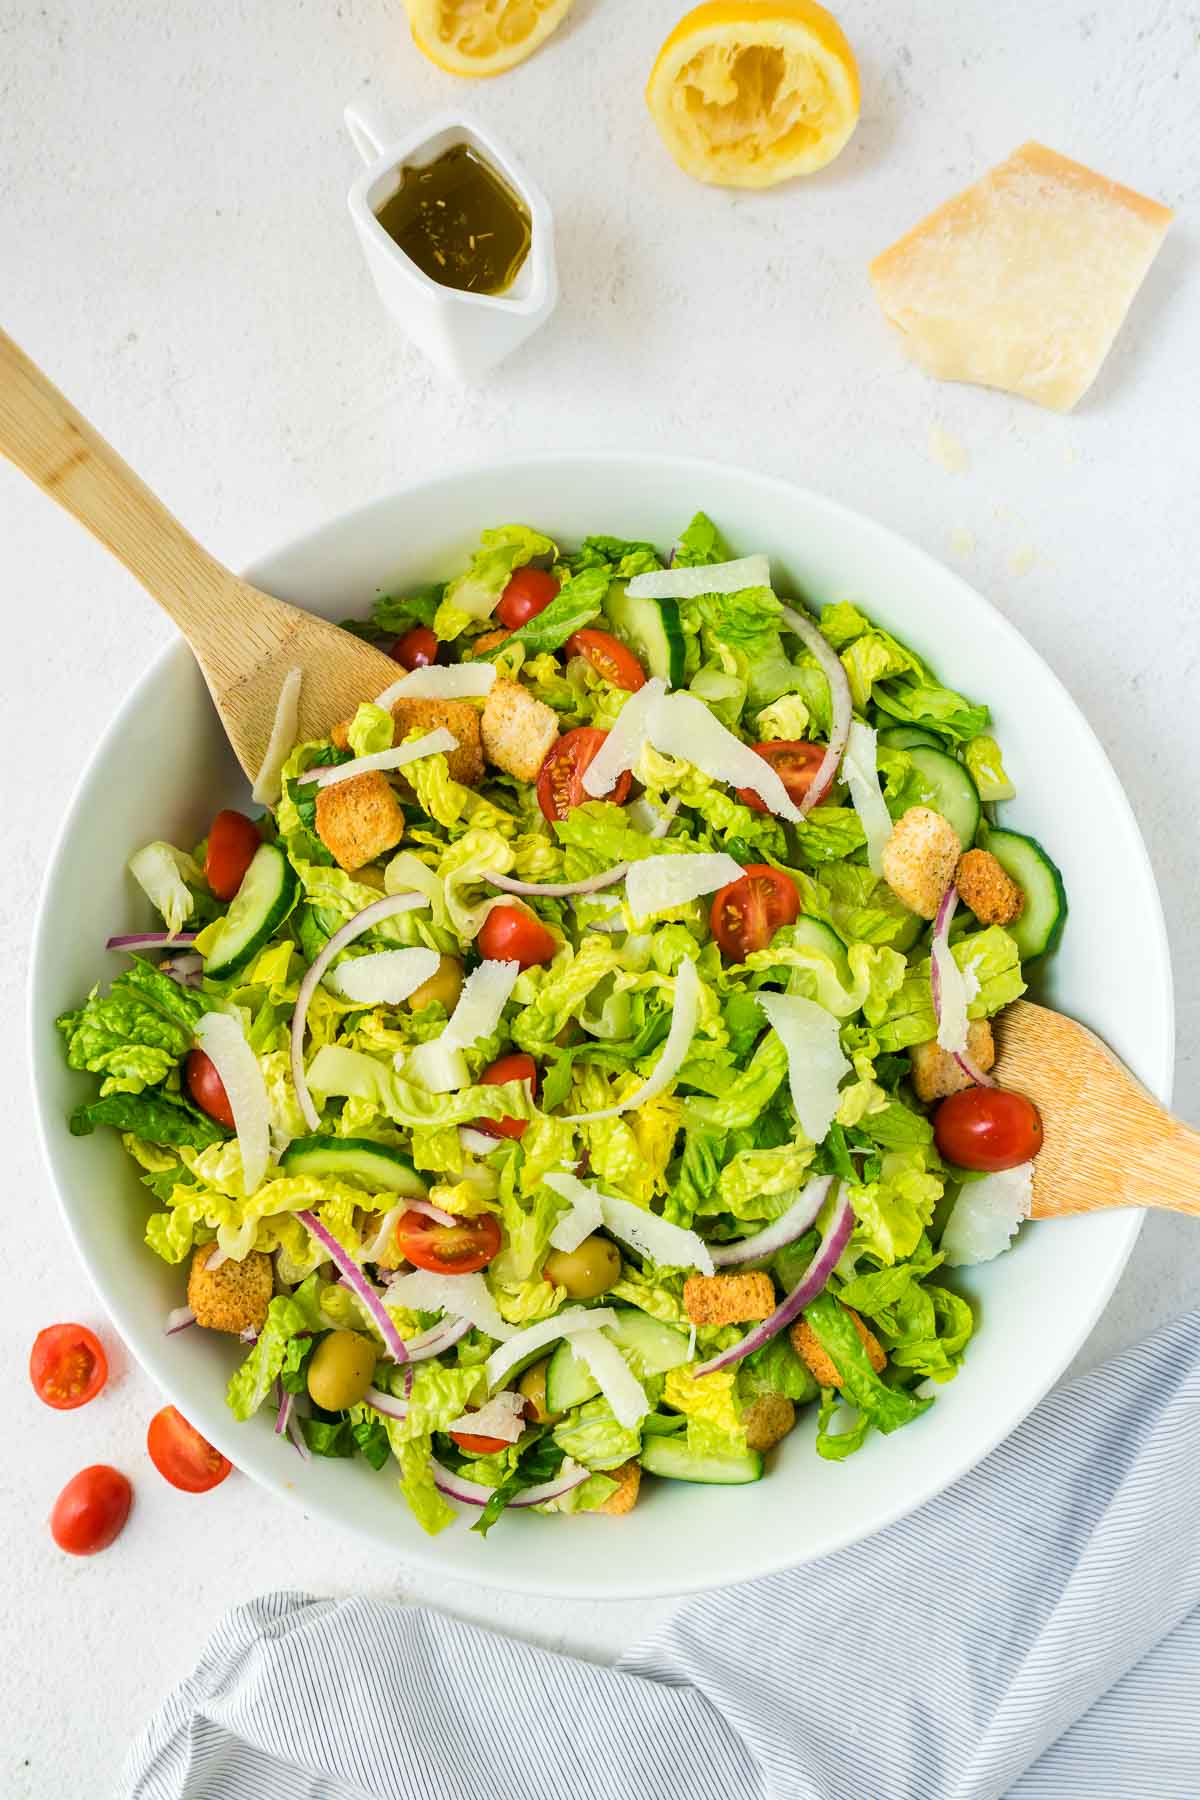
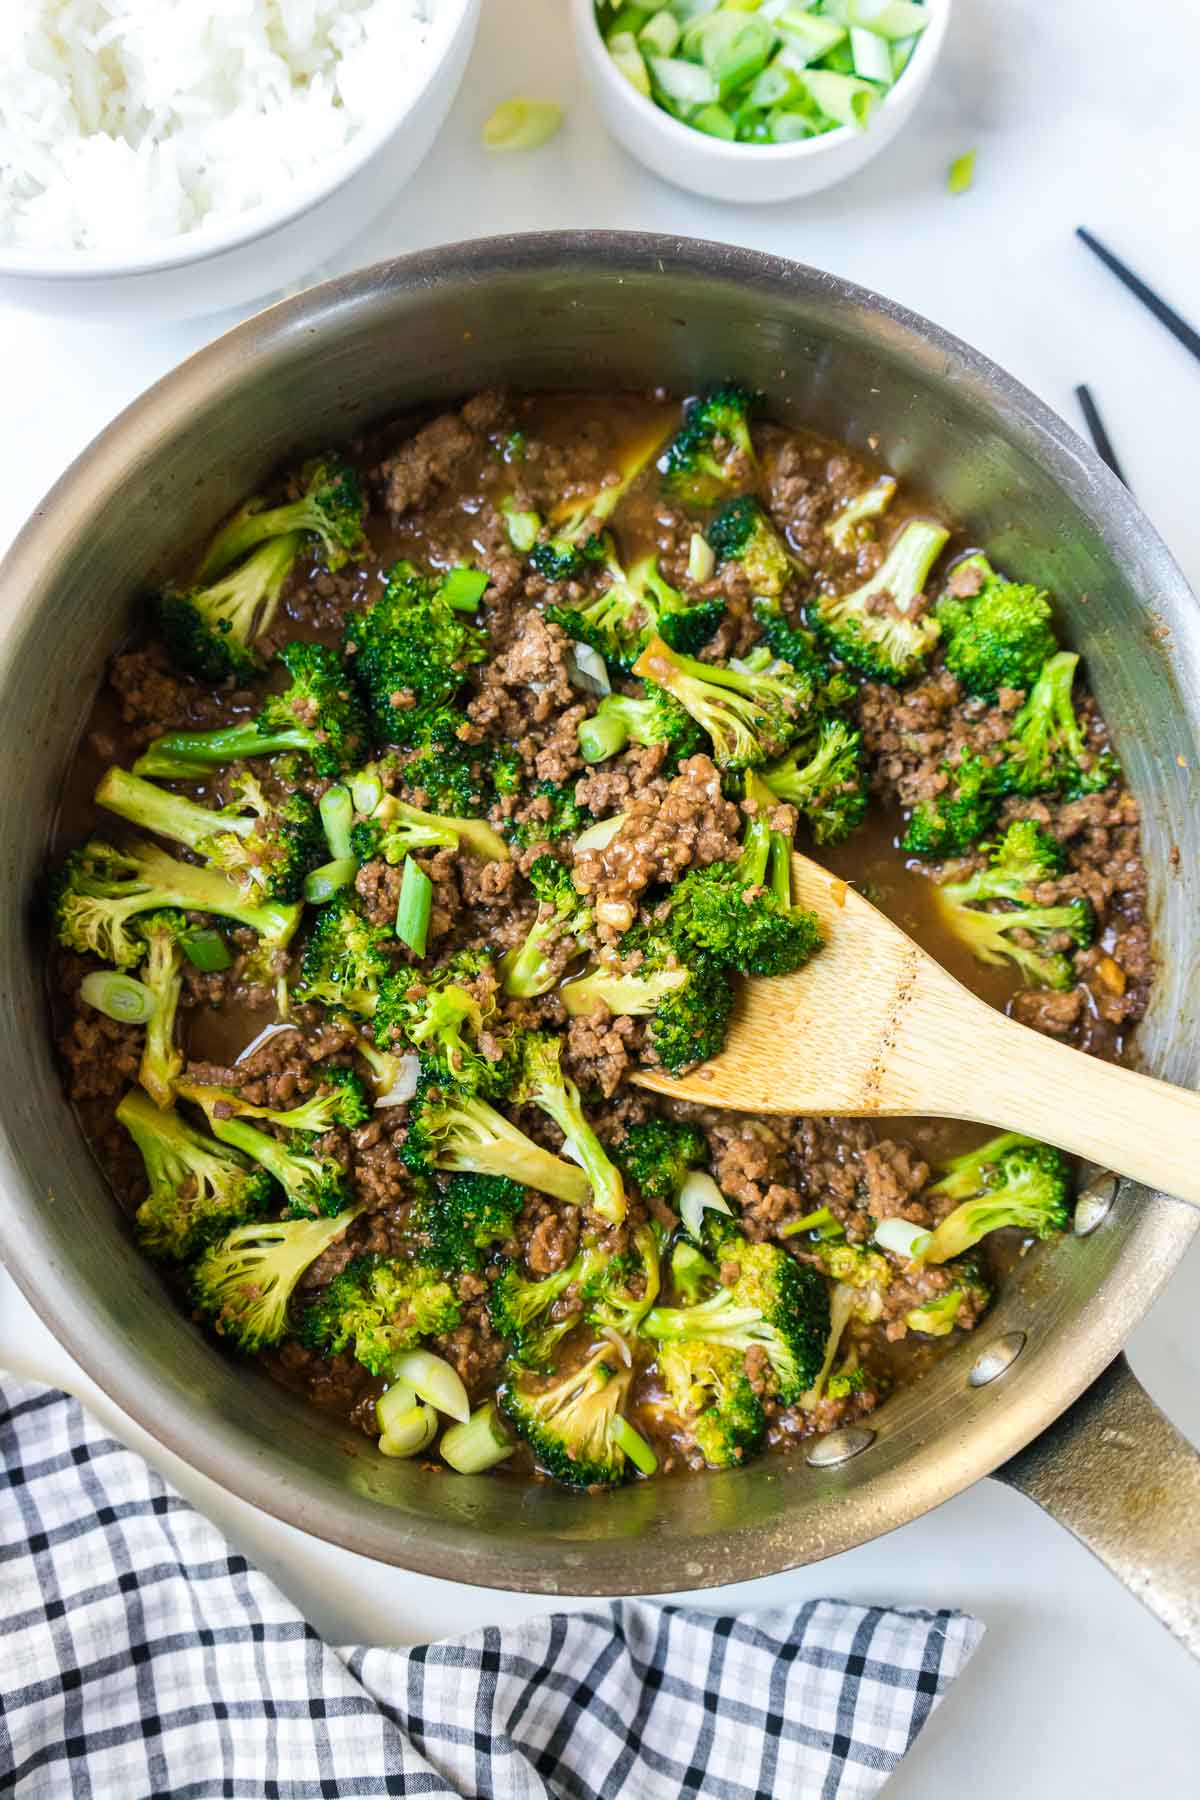
Linens: OMG, you guys! BEST EVER hack for linens!! MEN’S SHIRTS!!! If you are linen-obsessed, get your cute little booty right down to the nearest Goodwill (or your husband’s closet) and pick up some men’s shirts for a buck or two! Then cut the back of the shirt approximately 20″ x 20″ (or whatever size linen you like using). If you’re fancy (and smart) like that, you can hem them so you can wash them easily.
But these shirts literally lay SOOO nicely and you can go CRAZY buying men’s shirts (“linens!”) and still only spend about $20!!
Both the “linens” in the photos below are men’s shirts! Cute, right?!
So there you have it! My list of affordable blogging resources! I truly hope this helps guide you and weed out so many of the unnecessary things!
Questions? Reach out: [email protected] or find me on Instagram!
XO ~ Casey


I appreciate this valuable information. I took notes and went to Top Hat Rank and Rank IQ websites a few minutes ago. Thank you so much.
Great! Feel free to reach out with any questions but that’s a great start! 🙂 XO ~ Casey